
First Creation
Thingaverse is the amazon of 3D printing. After some test prints I was comfortable with the process so headed towards the creating my own designs. I am using a Creality Ender-3 with black PLA. I seem to find 0.25 a sweet spot for most prints, and if the model isnt required to be too detailed then 0.3 saves some time. The main issues encountered include;
- Bed leveling not correct, the print head is too close to the bed so cannot print correctly and get a good level of spread when being applied. Annoyingly I found every print would require a new level or point 2 would occur
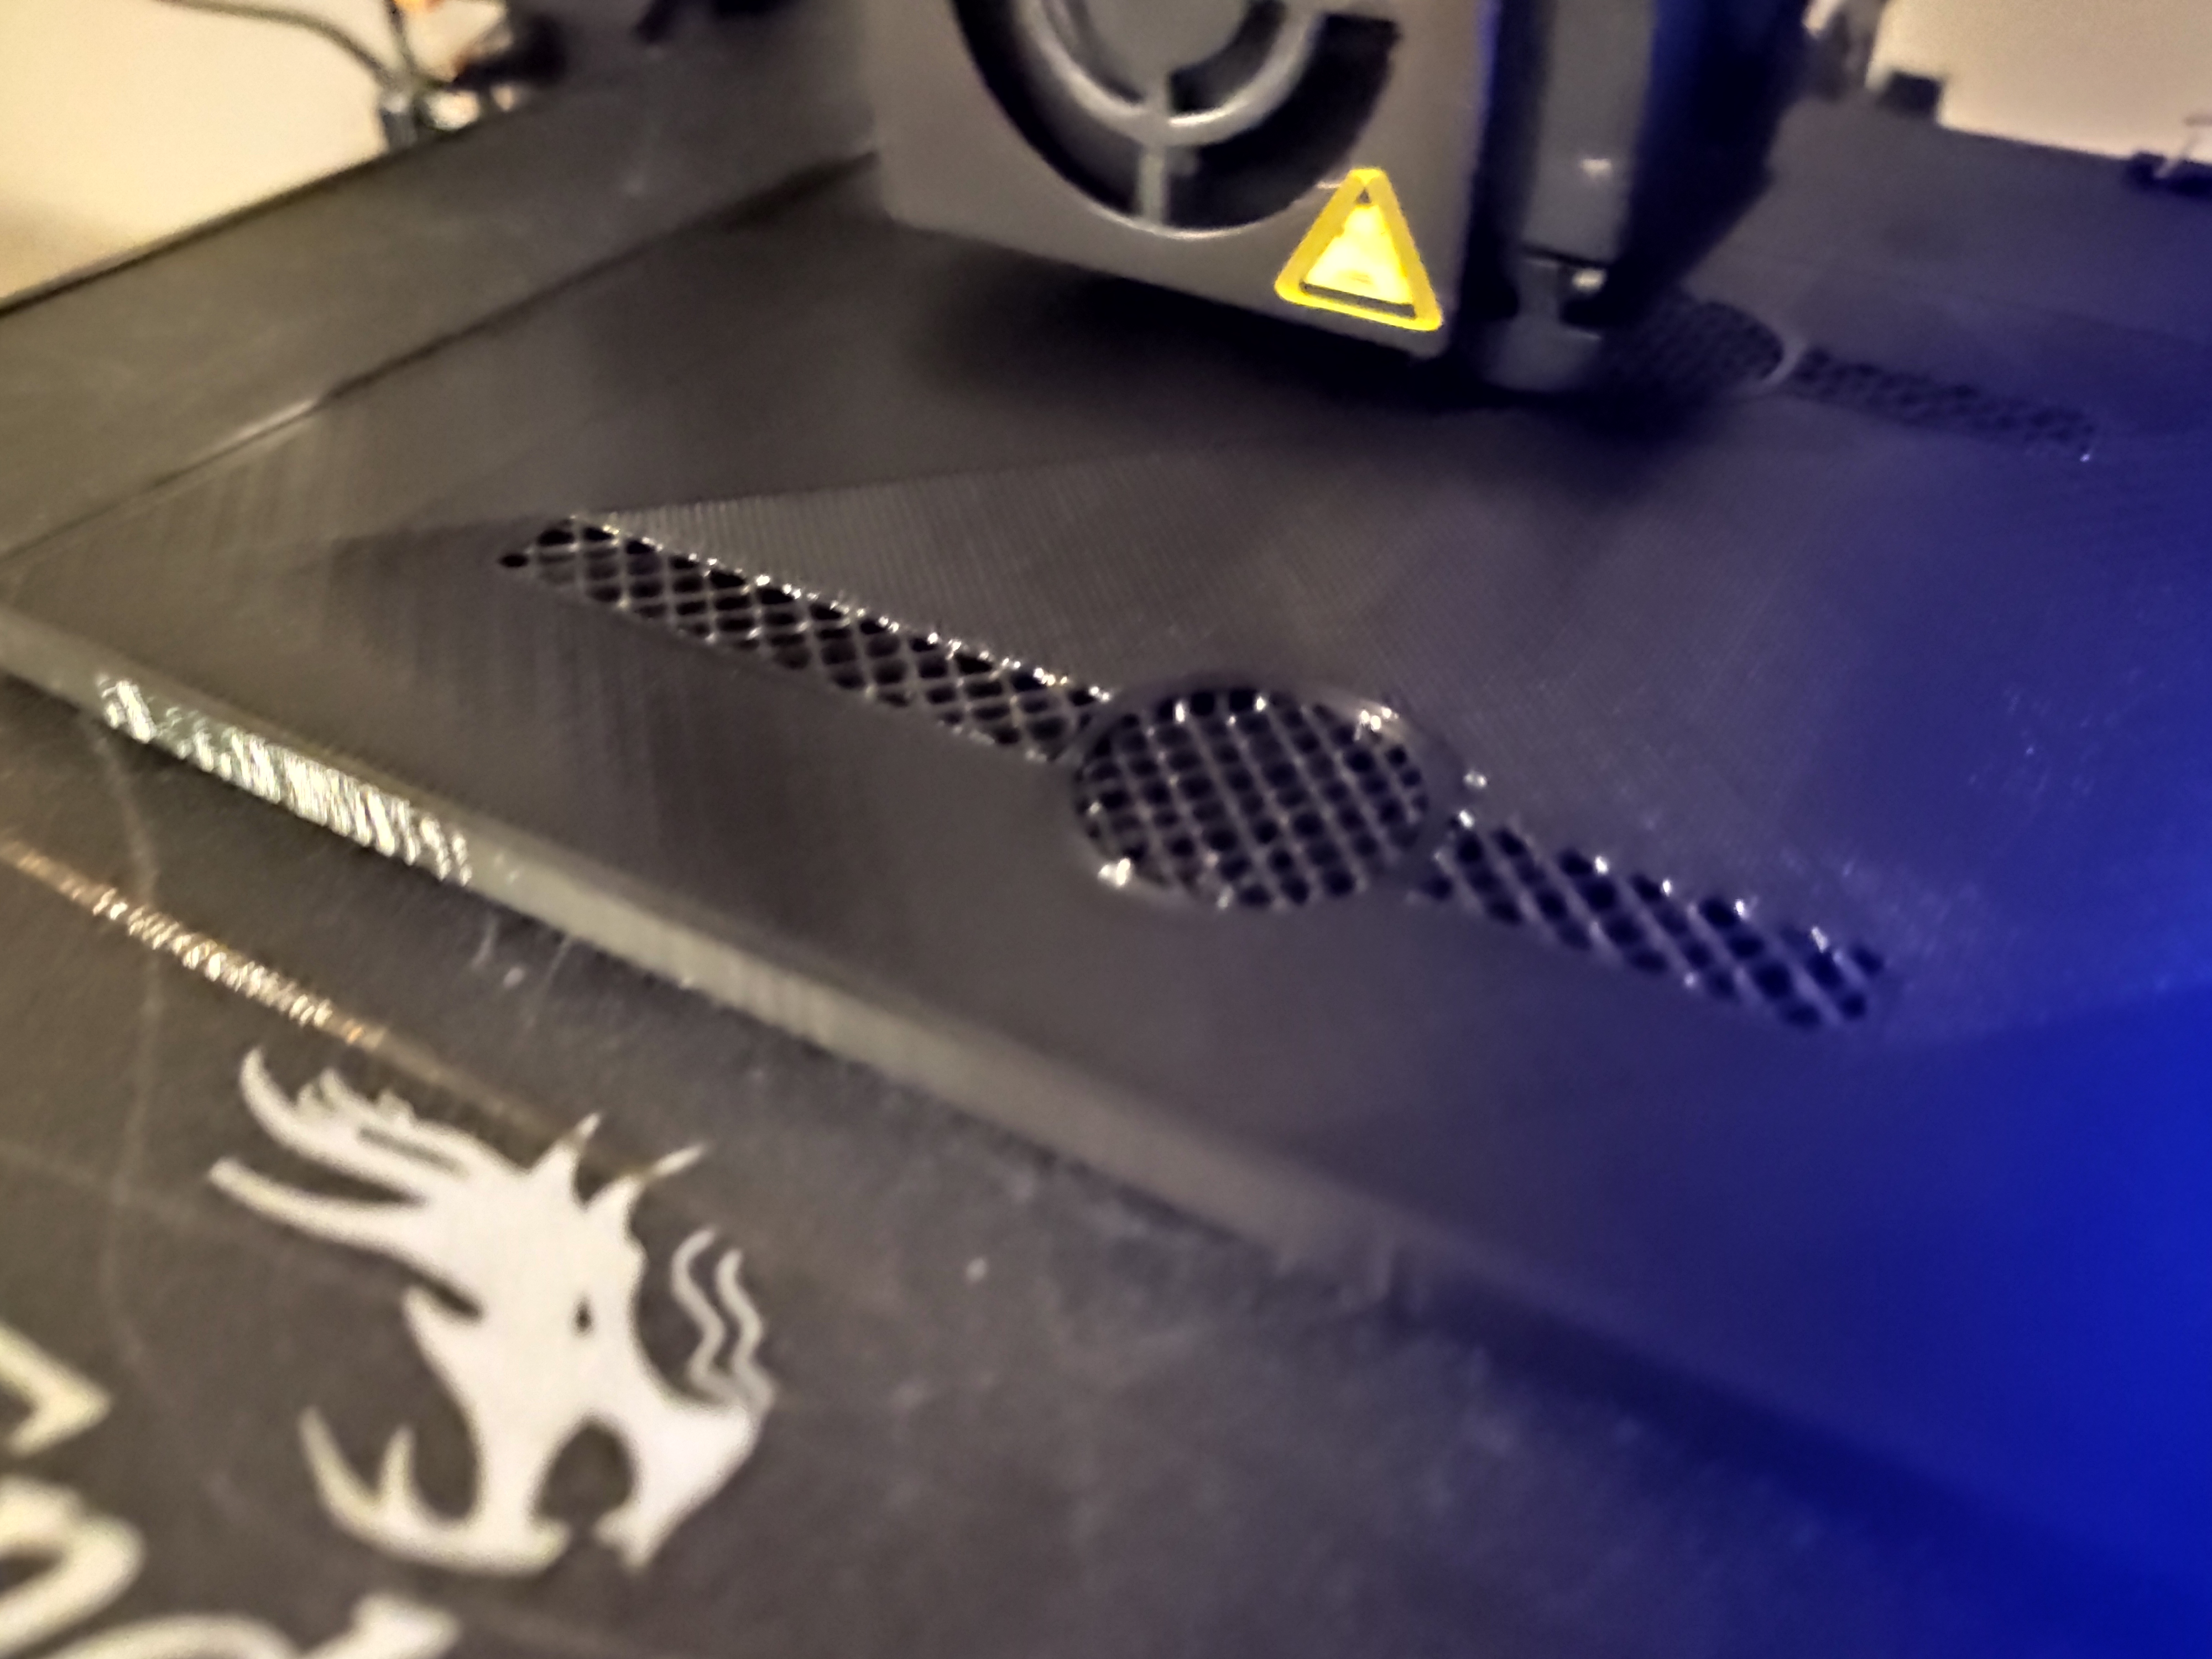
- PLA Jamming, the feeder would click and this would suggest it couldnt feed the print tip the spool due to a blockage. This would turn out to be the longest thing to fix, requiring taking the PLA out of the heated end and reapplying a fresh feed of PLA after unblocking with a needle.
Print Duration All depends on the fill rate and the end product application. Smallest print was a screw test which took 20 minutes and the longest being 18 hours for the first iteration of the bike wall mount
Modeling
Initially over lunch I crafted a door opener with a stylus on the end. This was created in Autodesk Maya and then exported as a .stl file for printing. Cura was used to slice the model, the print wasn’t correct however due to an error that I would soon be familiar with
WARNING Your model is not manifold. The highlighted areas indicate either missing or extraneous surfaces.
Discovered complex models are tricky to solve manifold where vertex faces don’t align as expected with so explored other 3D modeling options. Having experience with inventor I tried Fusion 360 as it looked like a more minimal version.
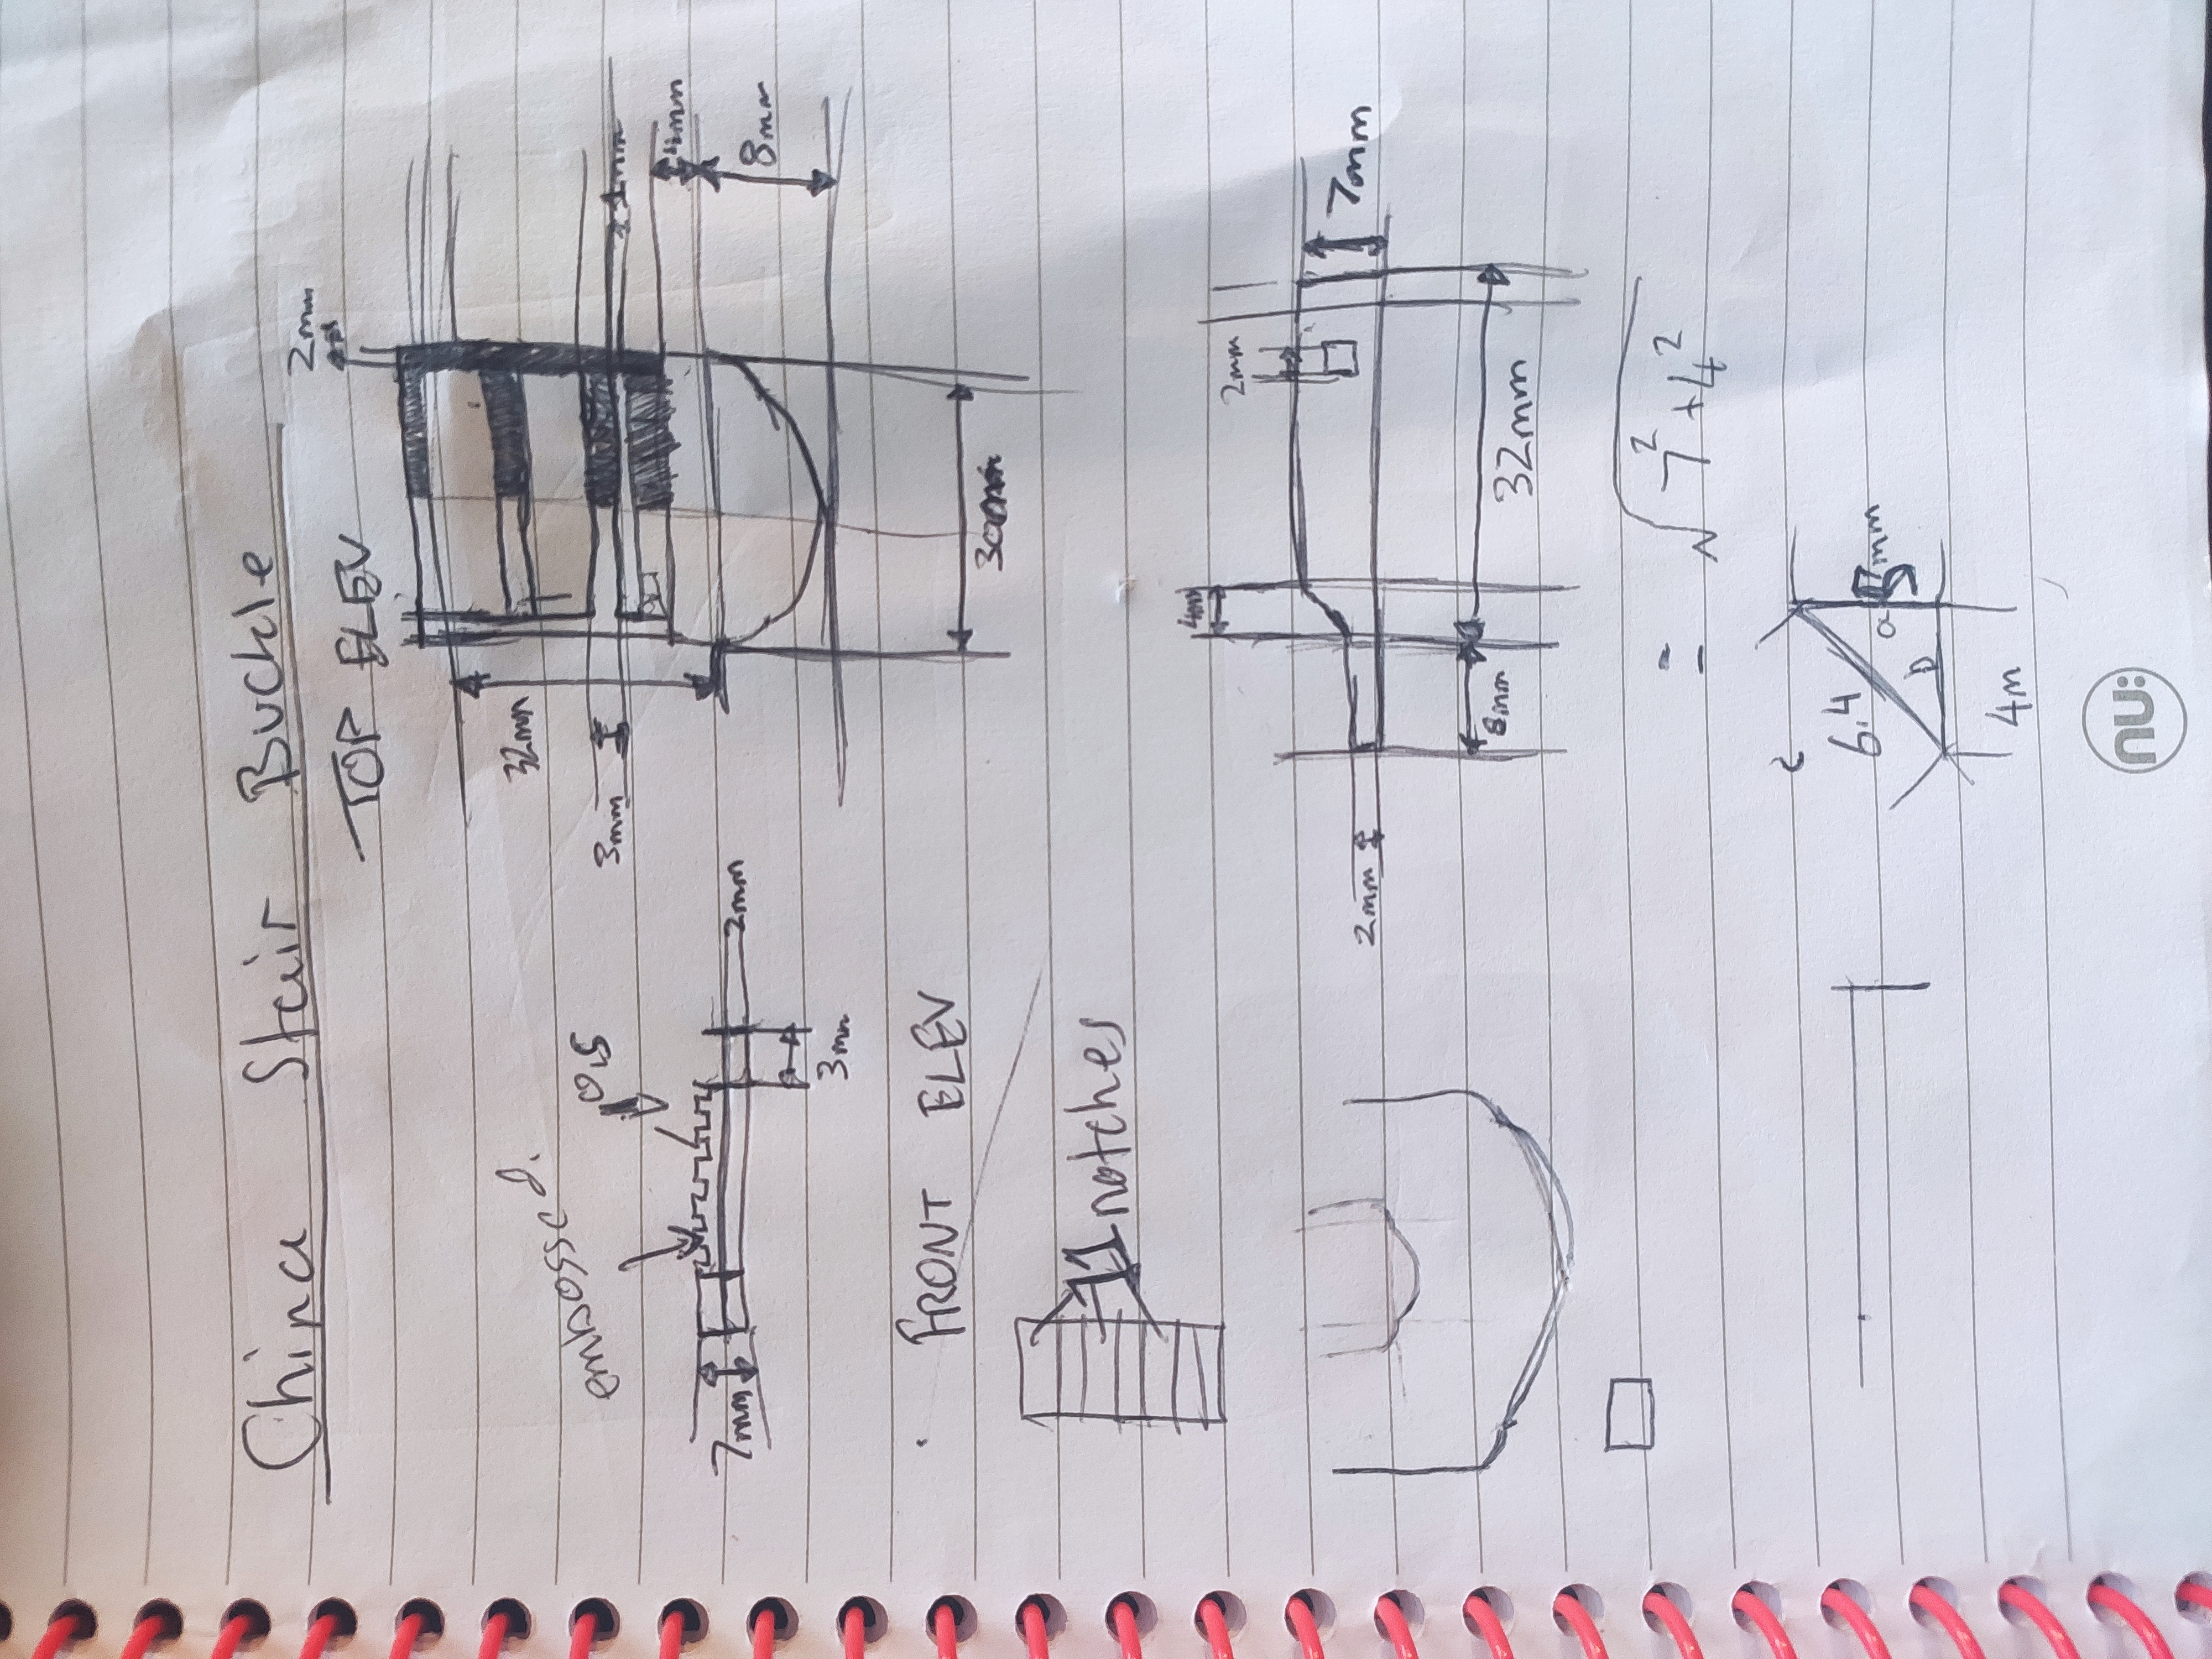
First model was the china step buckle design which was a success and got to grips with the CAD concepts again as its more or less 2D drawing on x,y,z transforms and extruding vs vertex manipulation. Better accuracy, but longer period of time to model. The step buckle worked and replaced the broken one on my bag that you can see below. (spot the 3D printed one!)
Measurements
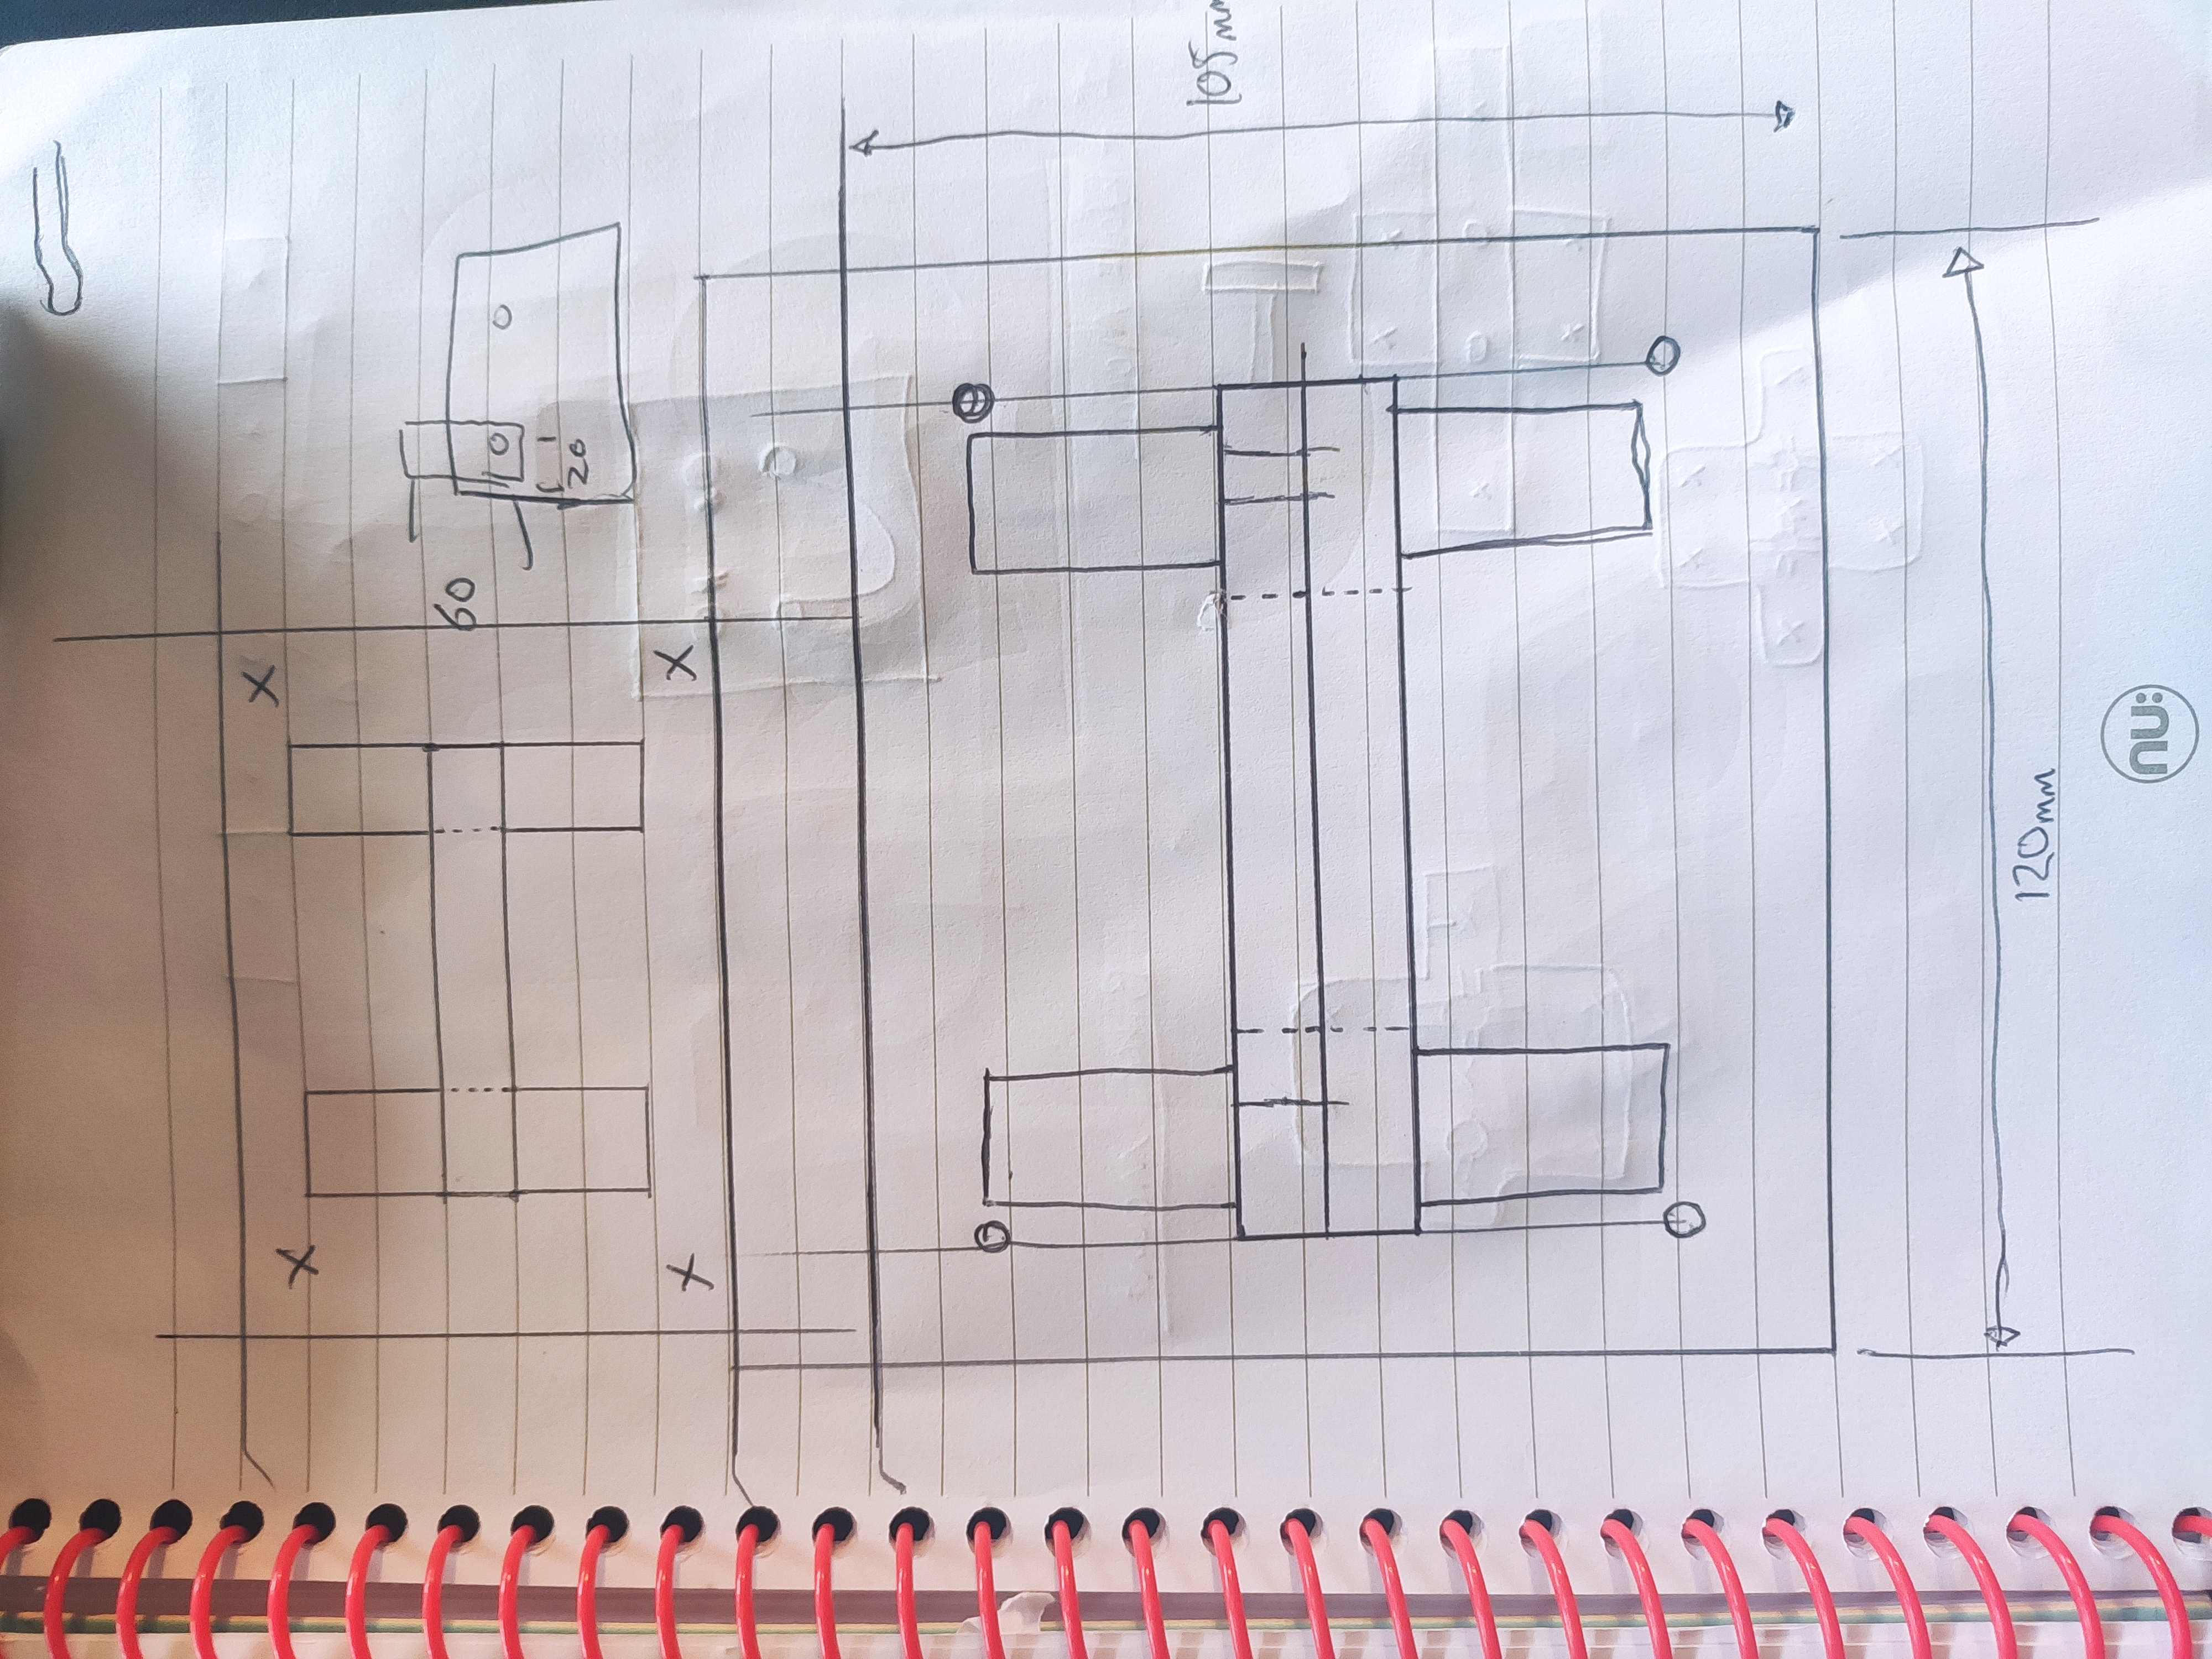
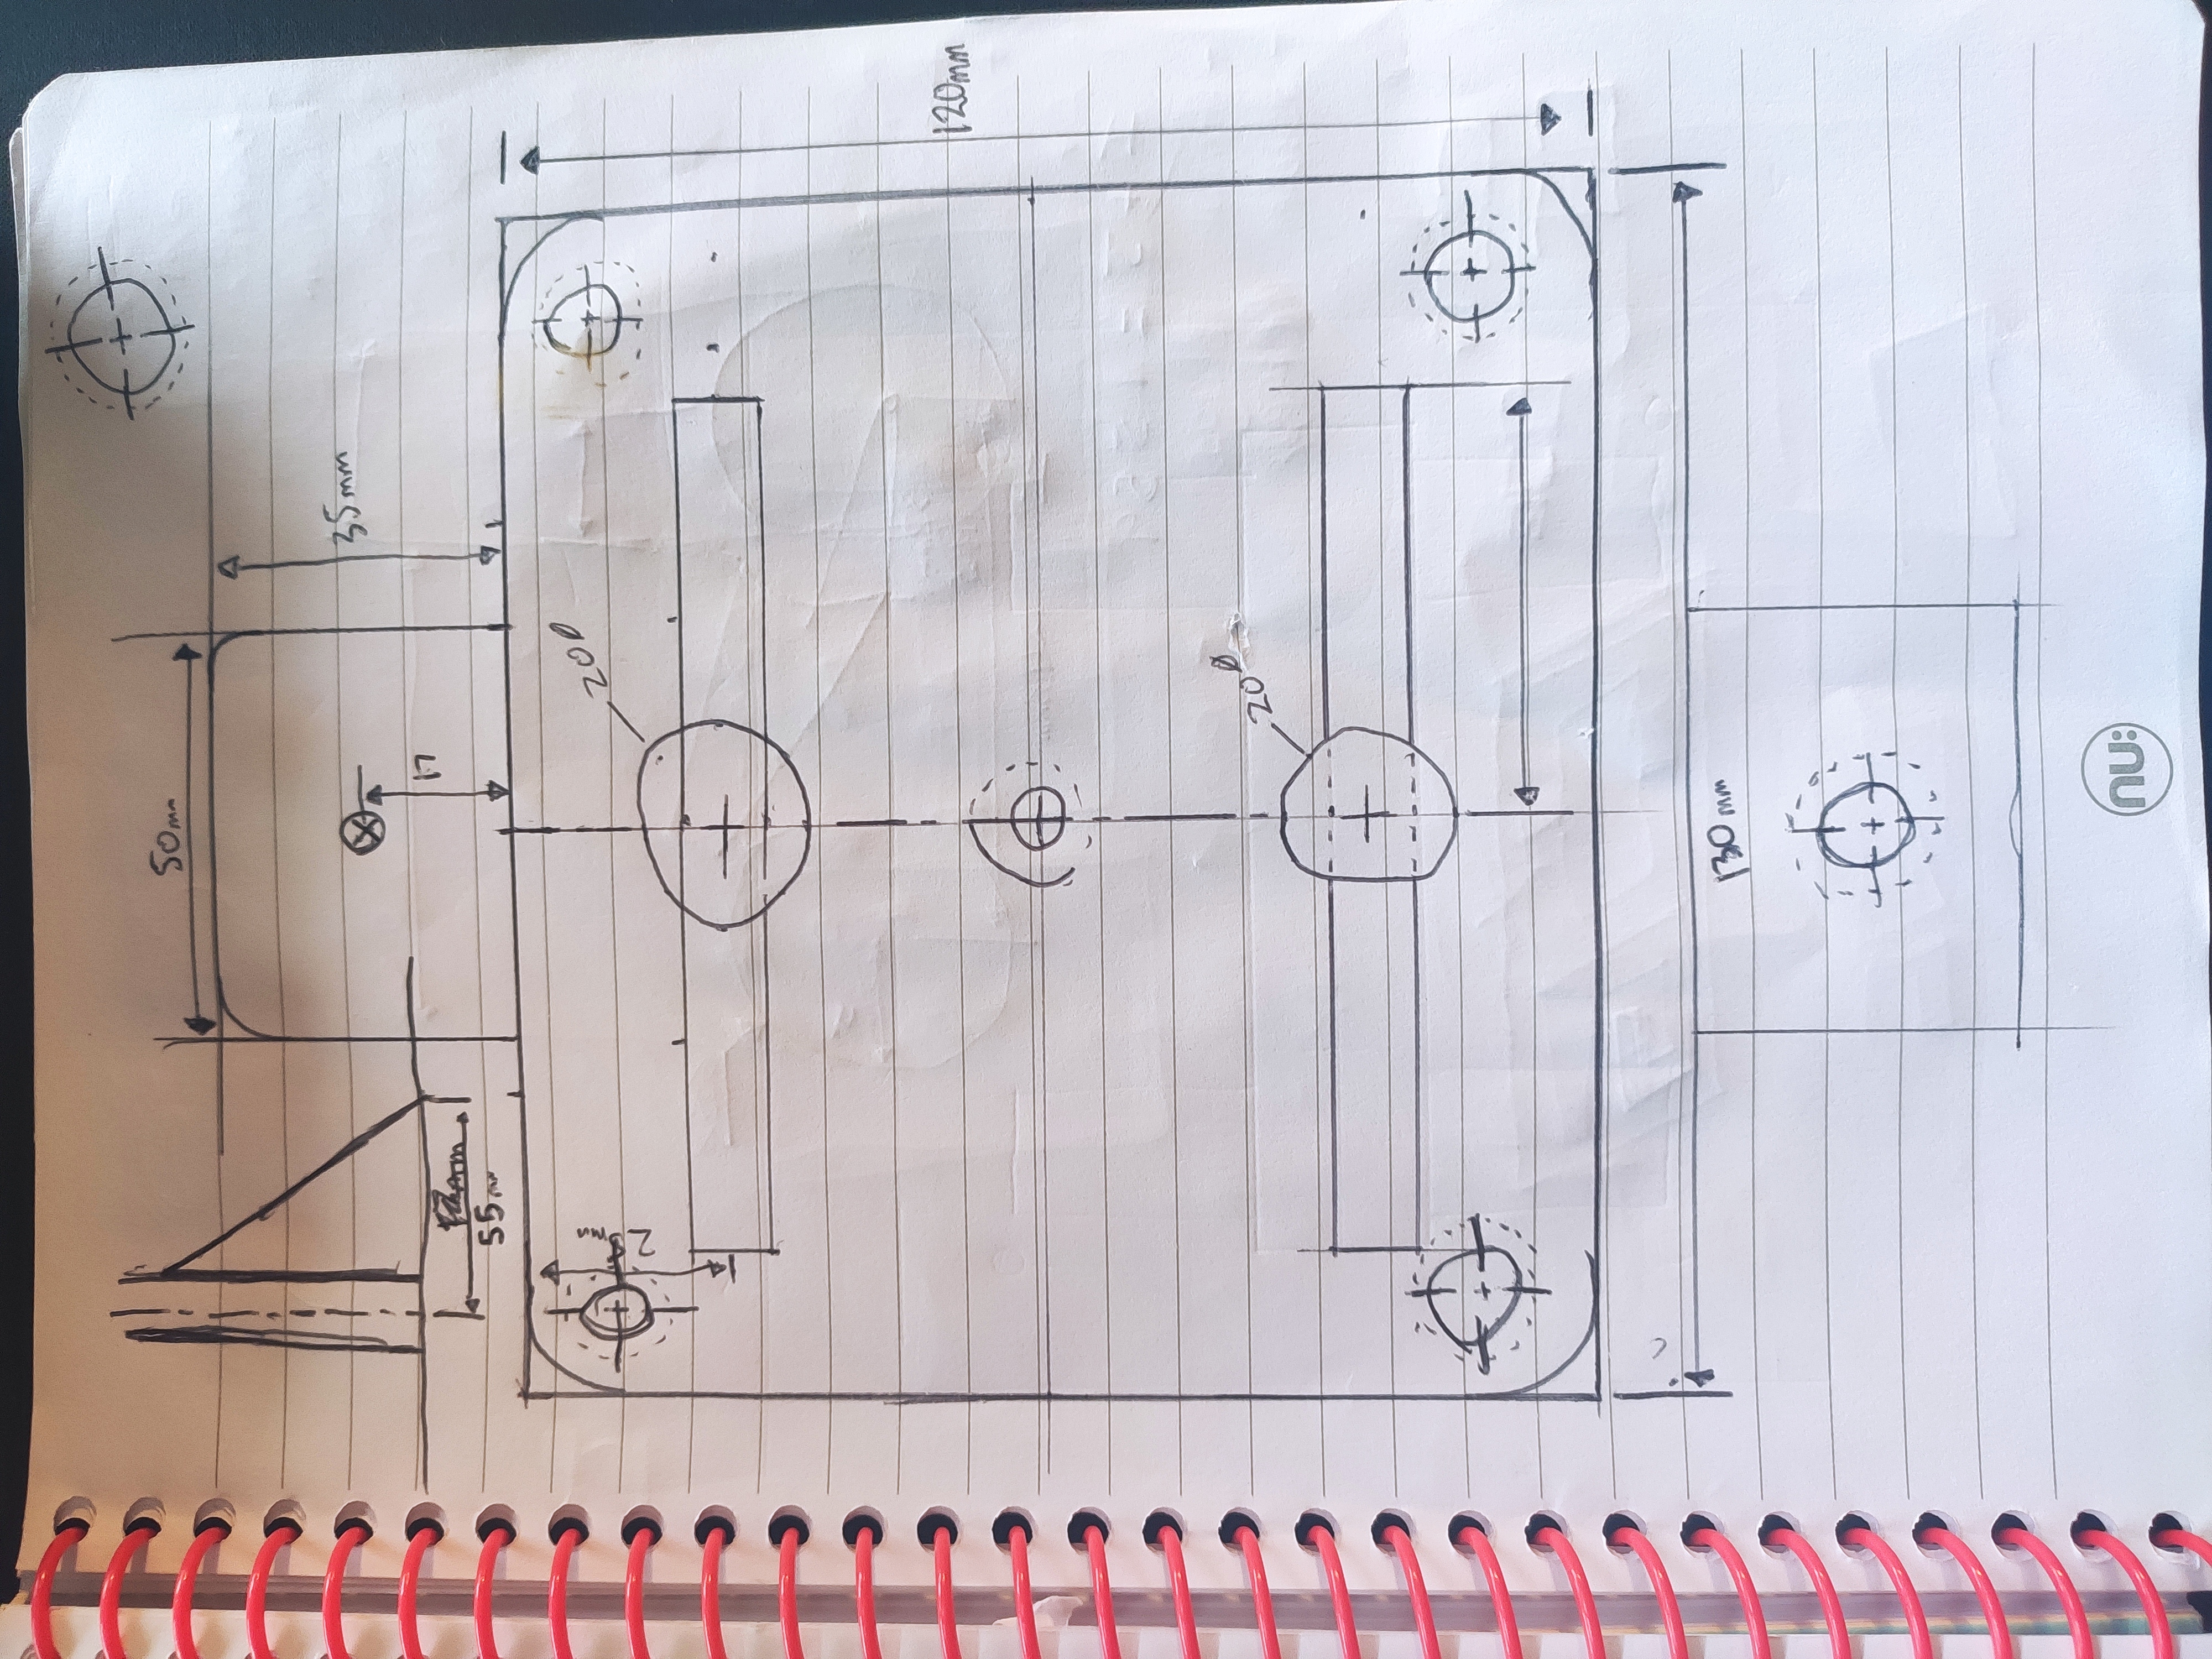
After testing the design process using Autodesk fusion, I was ready to try it on a prototype model that is at scale MUCH bigger in relation to the first design to print. We are talking about a 5x5cm buckle to a 20x15cm 3D print which in itself has complications. Therefor speed of iteration became important. As the 3D CAD model needs to be mm accurate I sketched the design out on paper first and used these measurements to translate into the CAD model. Nothing fancy by any means of the imagination but going into this with just an idea wouldn’t have worked.
If the model ended up looking wrong (that gut feeling your design isn’t what you visioned in your head, leads into visual-spatial ability to some extent and a rabbit hole of research to check out in the further reading section below) if out of scale it would allow me to adjust and make a modification easier having a basis measurement to go from. This proved really important after the initial prototype where I decided to add in the “wings” to the mount providing a wider surface area on the wall mount and also provide 2 extra screws to support and dissipate the load against a plasterboard wall.
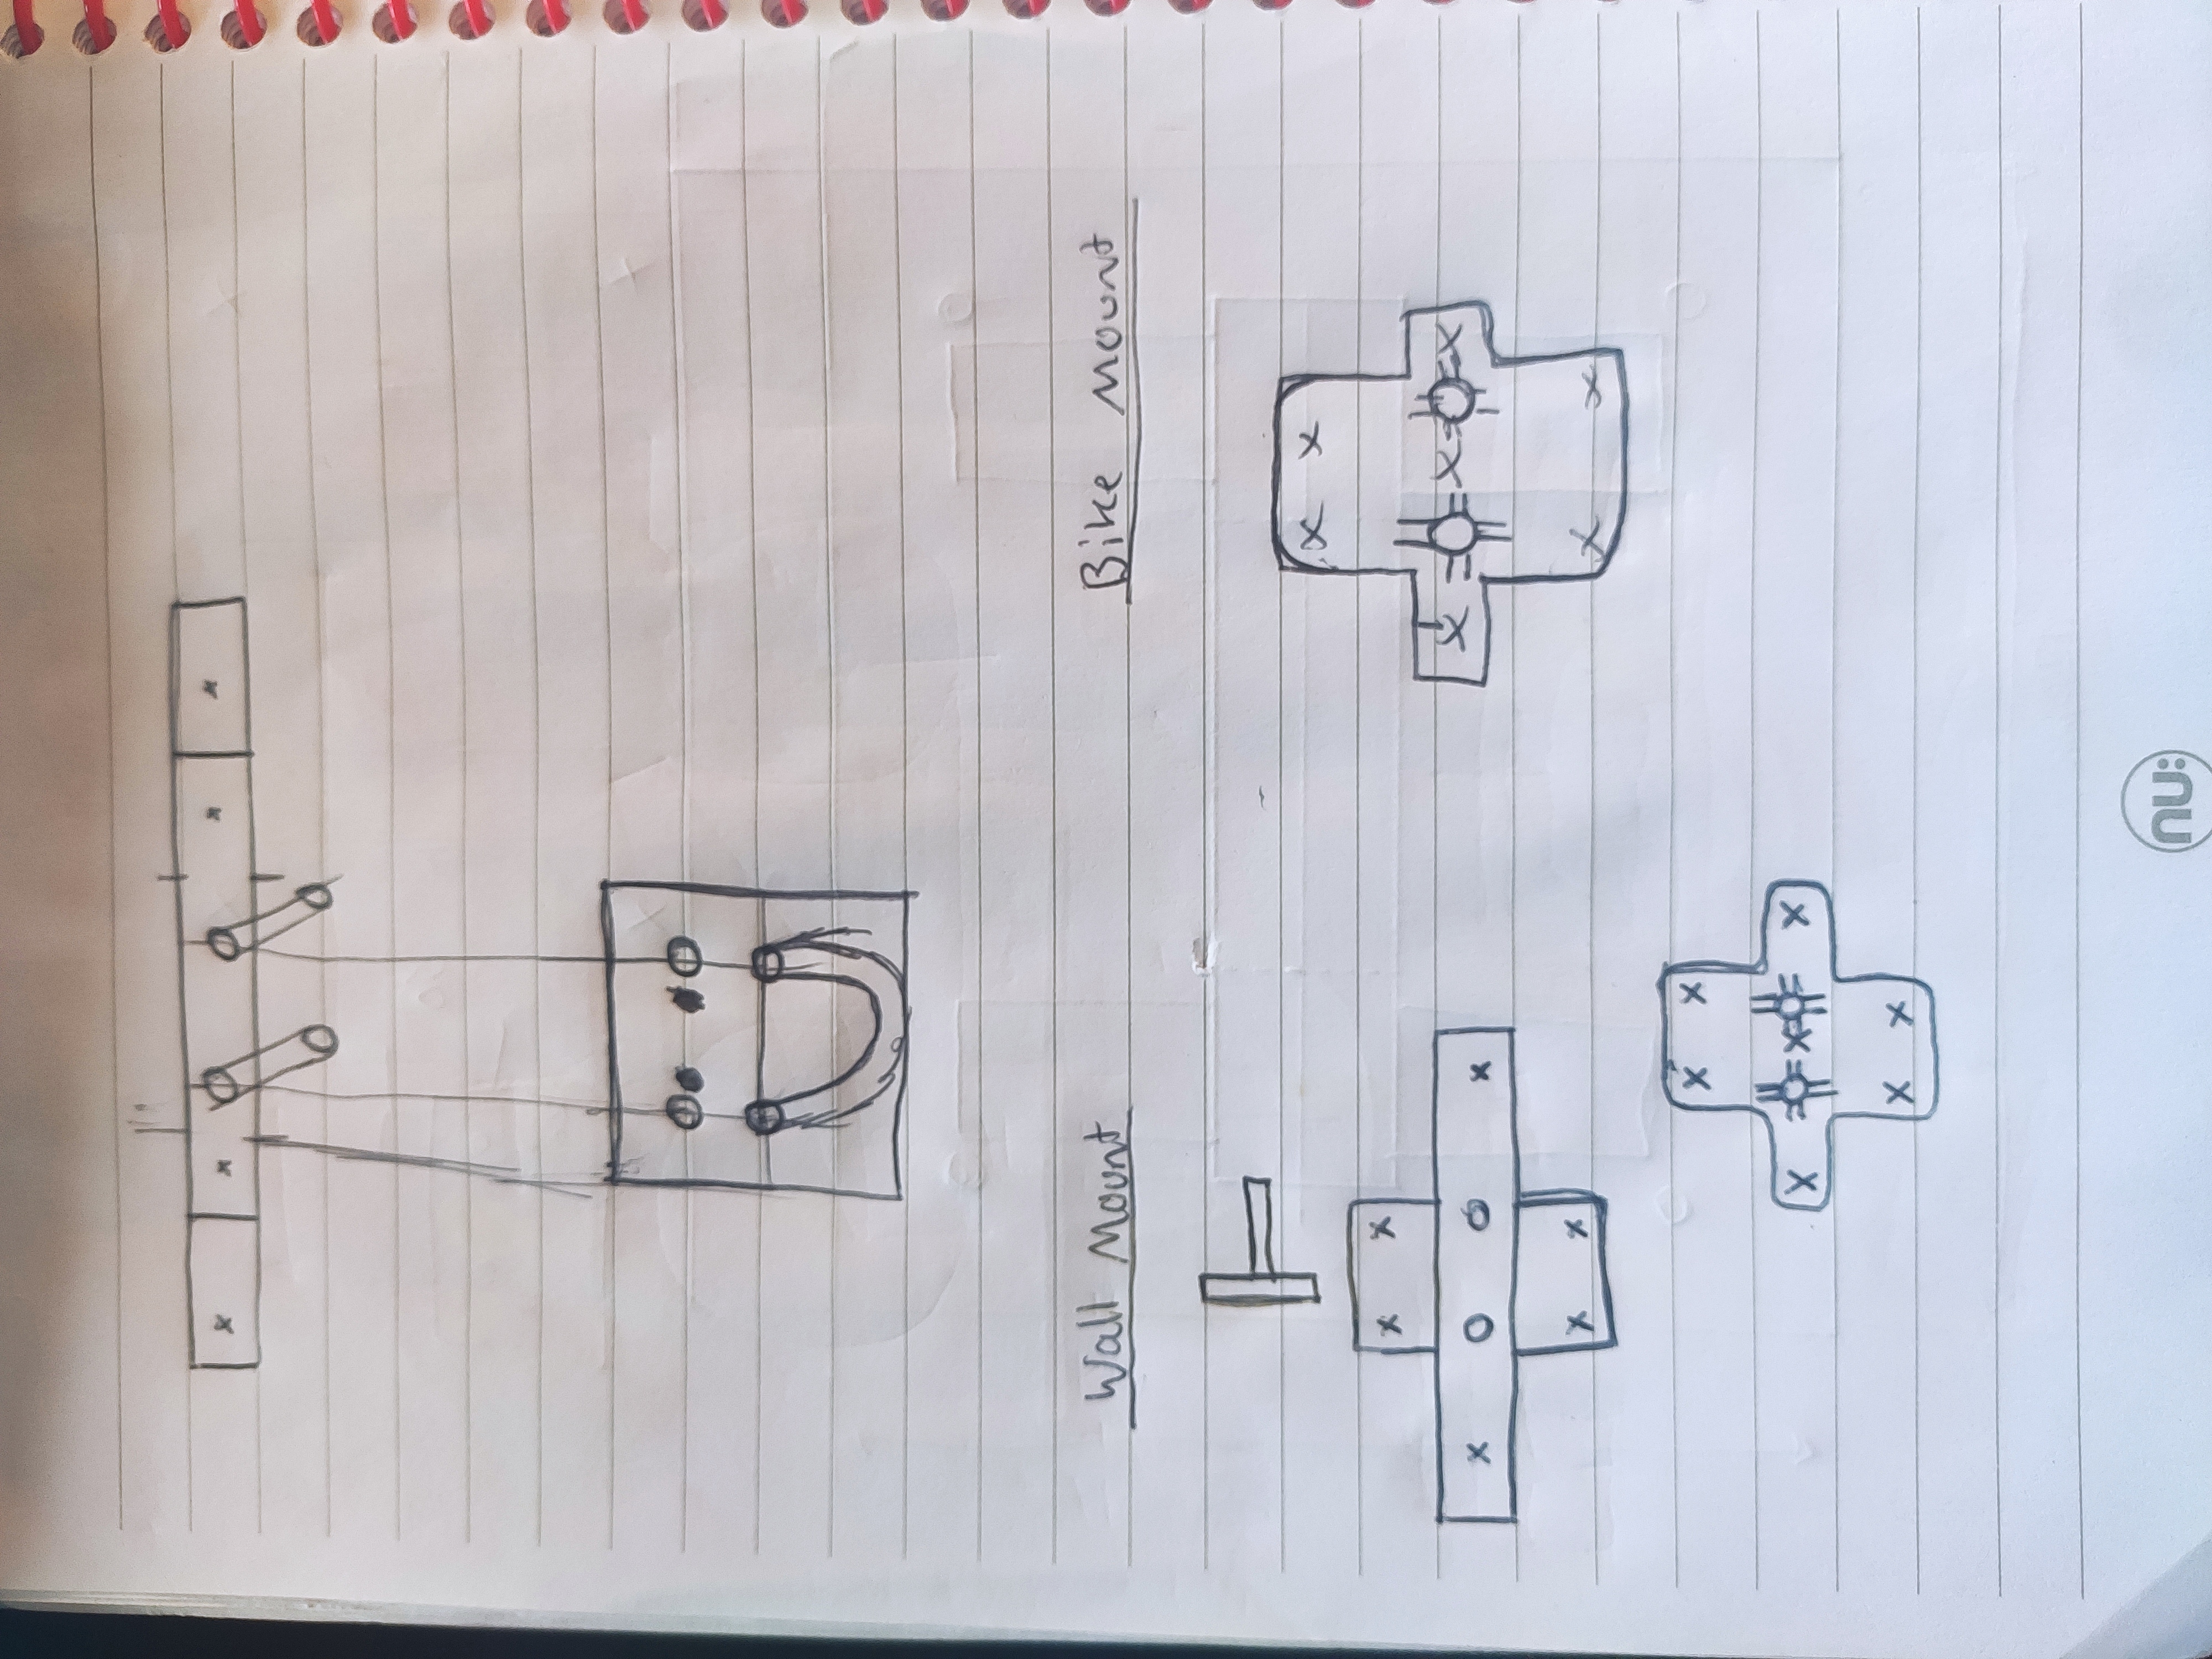
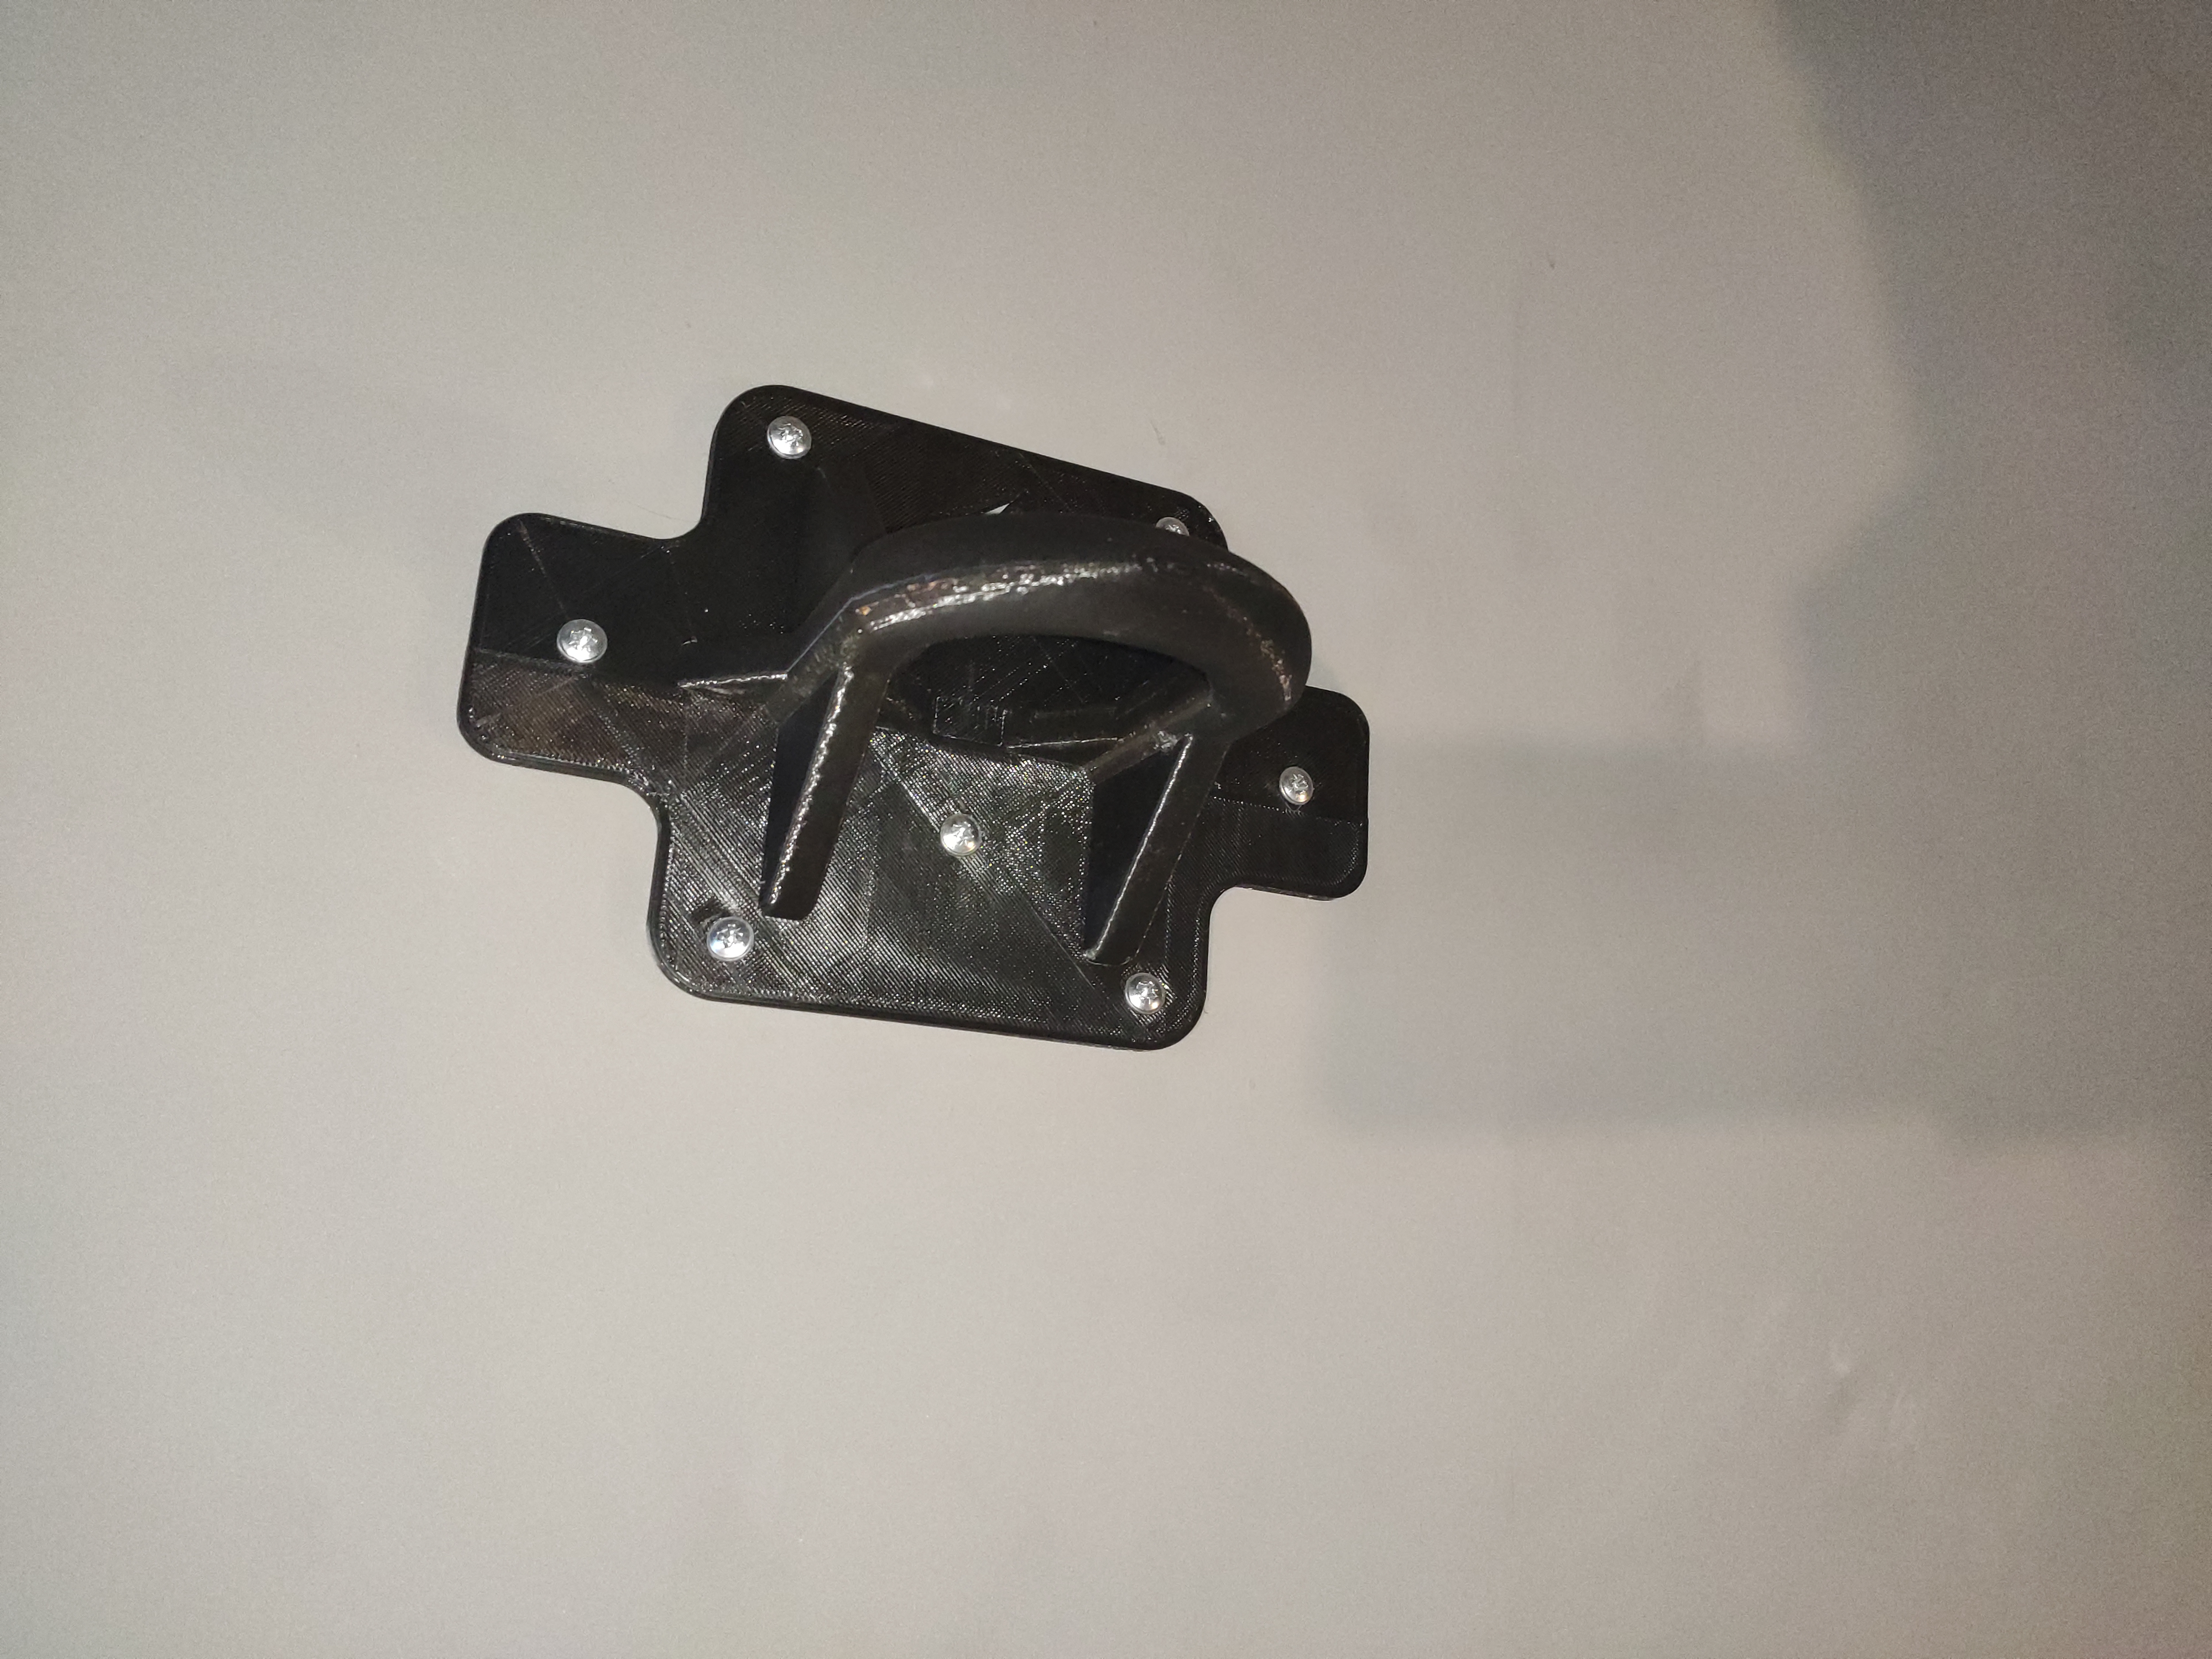
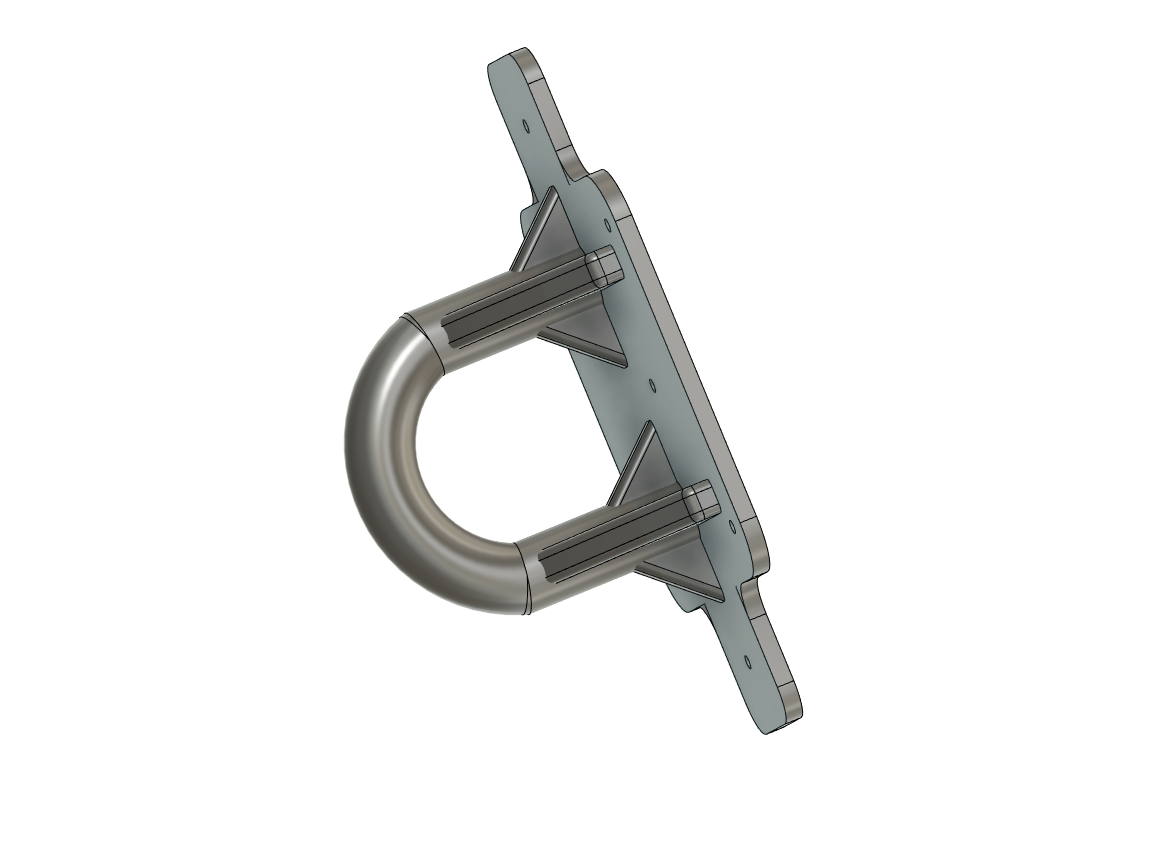
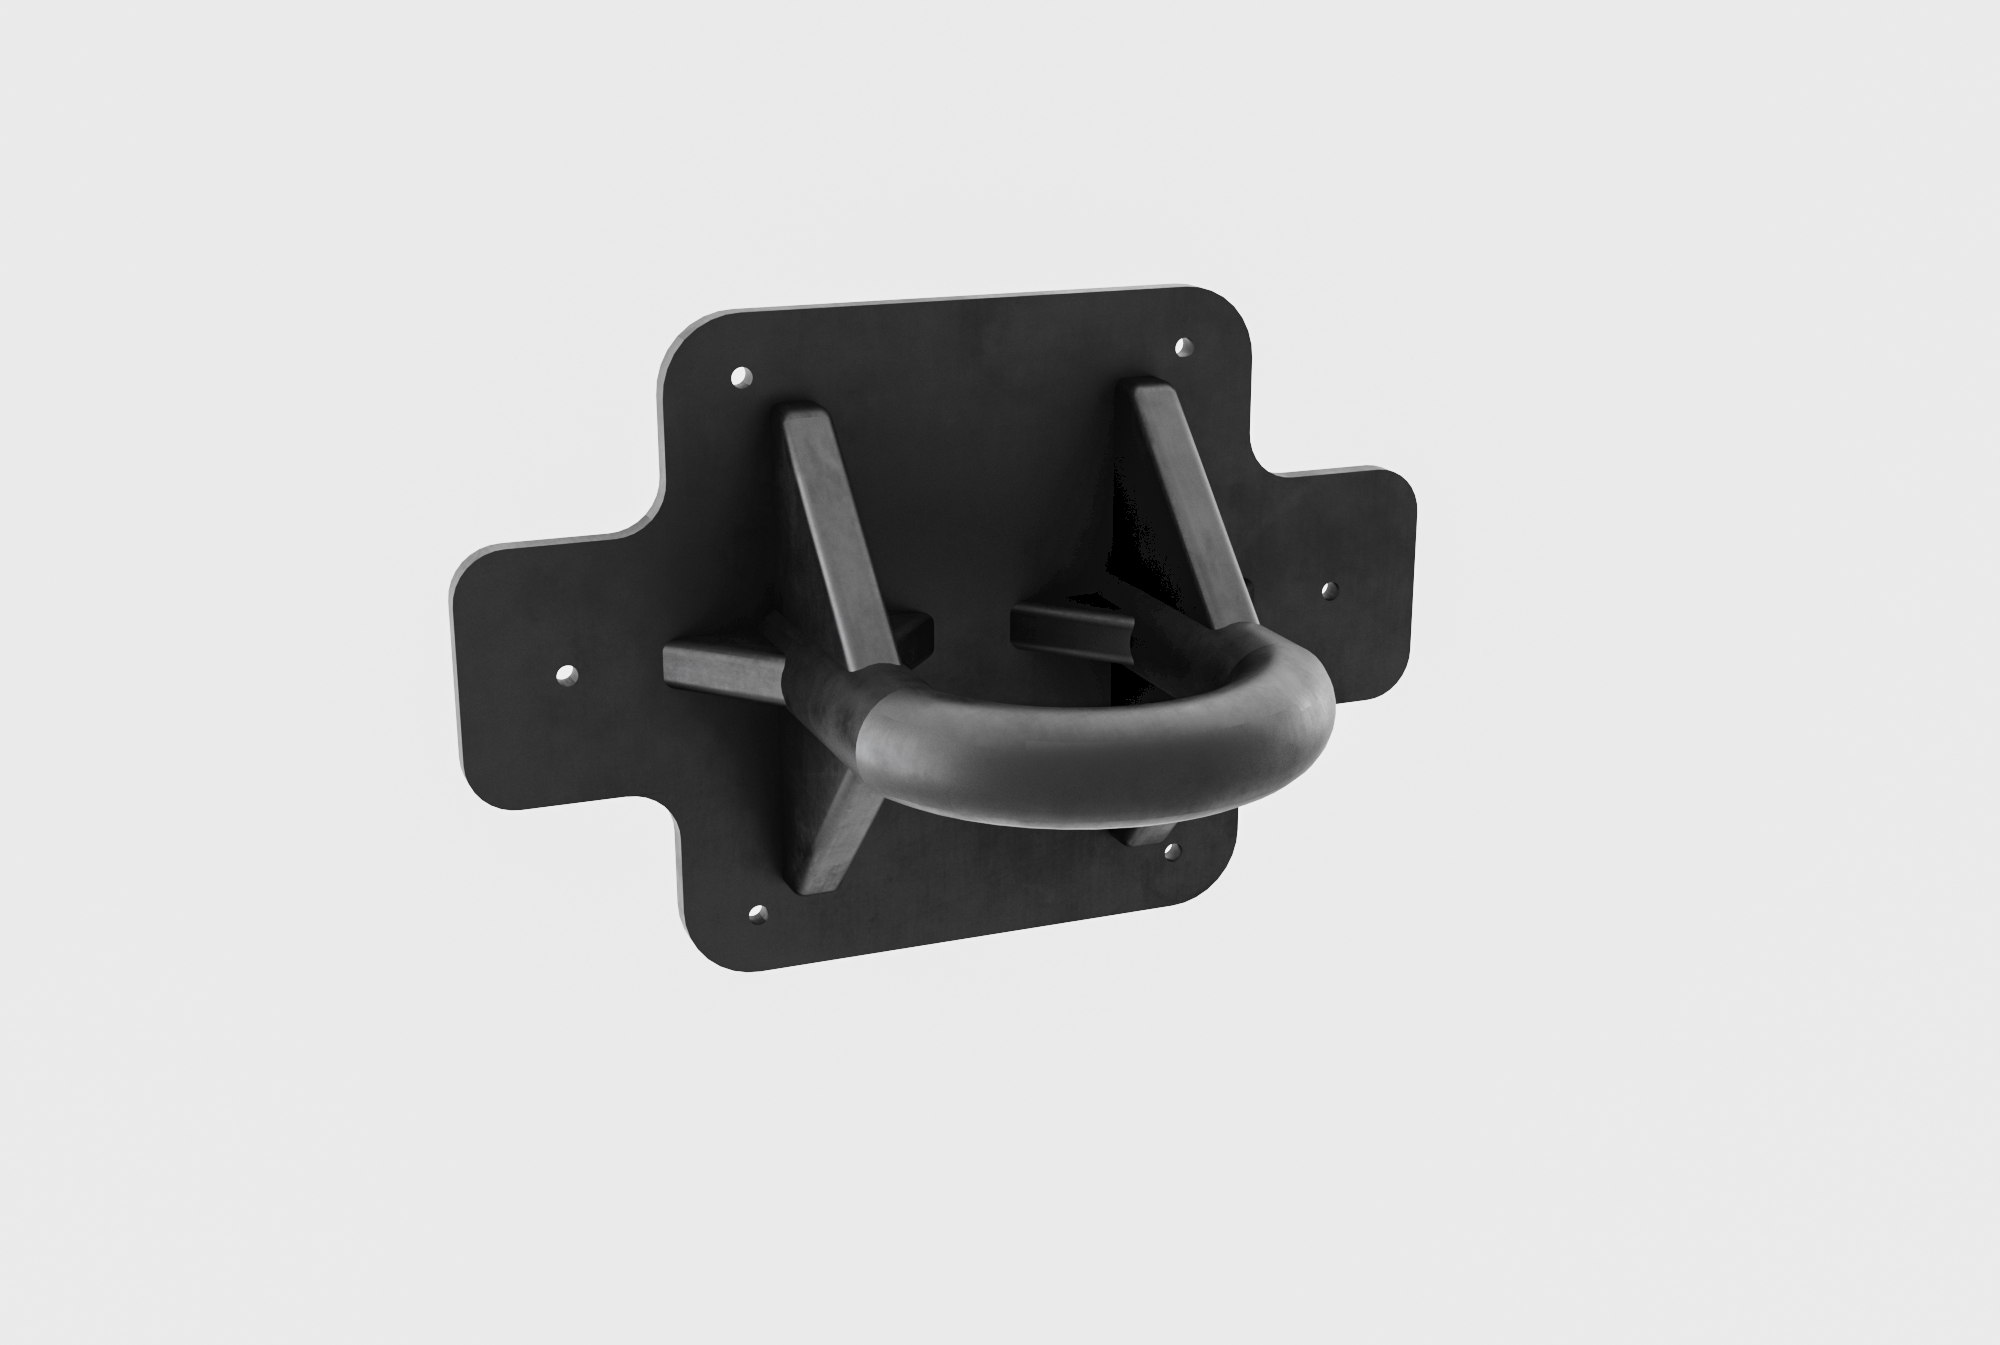
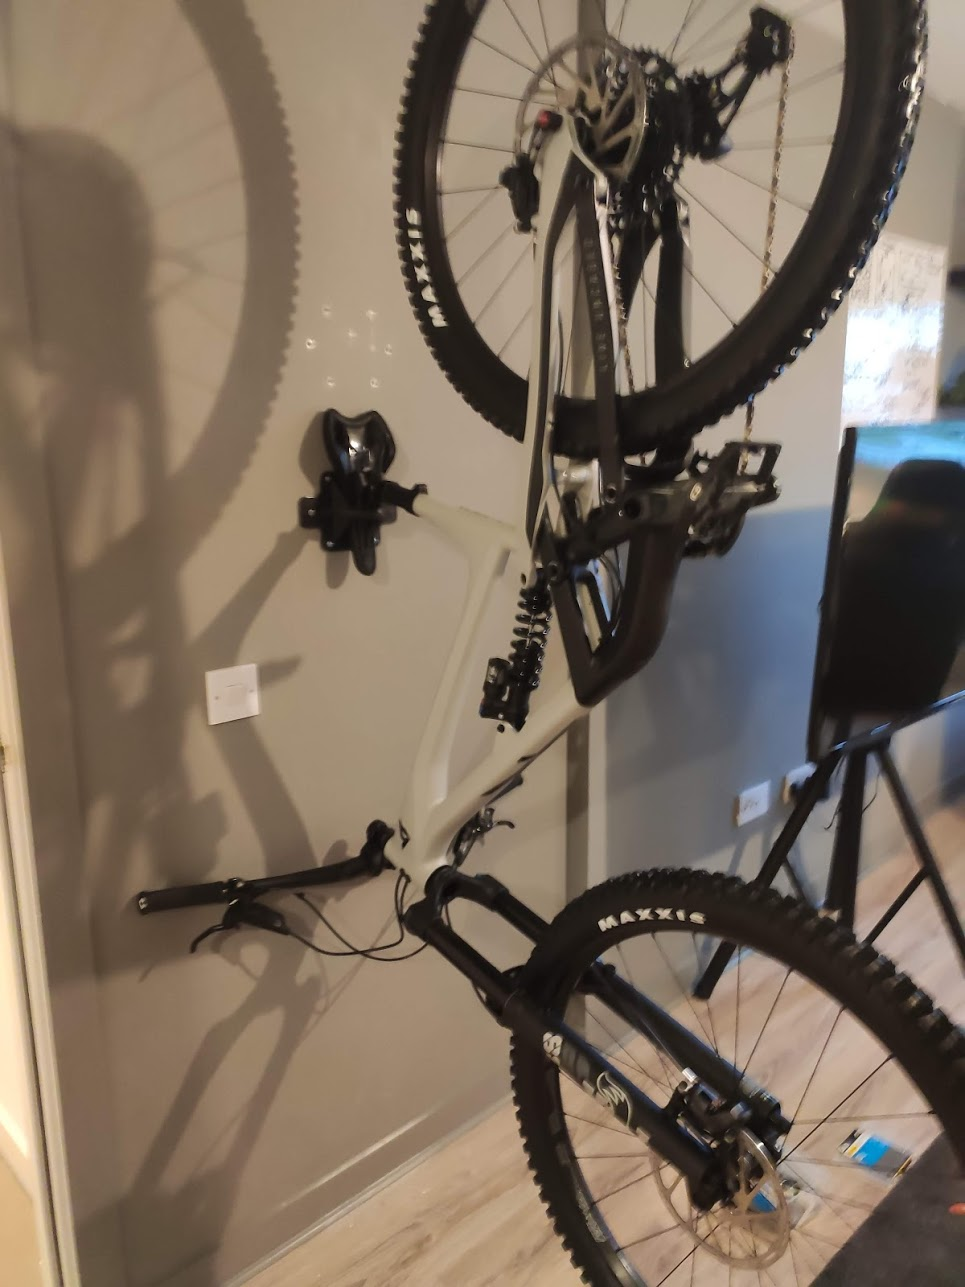
Bike Wall Mount
The next a bike mount. Haven’t seen this design anywhere and it is solving a real issue in my life. Ran some simulation tests using “plastic” material in Fusion 360, took a while and never really got a definitive result so ended up mounting the v2 print on a plaster board and then put some weights in a bag and hoped for the best. I live in an apartment and have no access to safely secure my now quite fancy mountain bike, this mount keeps tyres off the floor and will fit any bike. Also removing the wheels will allow for less space taken up by the bike itself.

Modification
The mount finally gave way after a month so a redesign will include more angular edges to speed up on printing time, but it will also allow me to toy with the curvature of the actual “hook” component. It needs to be shorter leading to the revolve arc. This will keep more of the pressure on the supporting structure and not so much on the far out piece of plastic, essentially keeping the center of gravity closer to the wall = better.
Snowboard & Ski Mount
The next design I want to create is a snowboard mount that is similar to the two cork screw “slide in” approach I have used in the past. Initially simply 3D modeling a corkscrew with a place for a screw, along with some heat shrink tubing to add extra grip and to not damage the edges of the boards. This design would allow me to mount the board vertically or simply put them side by side a meter apart and let the board rest on it. This should conclude storage mediums for my biggest pieces of kit. Hiking bags, harnesses and more are all on 3D printed hooks around door frames making everything really easy to access.